How To Schedule Post On Instagram 2022. In today’s fast-paced world, everyone is on the lookout for something. It’s difficult to keep track of everything! Posting on social media is certainly not easy, especially when you have a lot of work to accomplish. However, it is crucial! Because social media is the key to the entire universe. And if you disappear for several days, your fans may lose interest in you! And this might have a big impact on you, especially if you run your company online! Instagram is without a doubt one of the social networking sites that has positively improved for internet business. Isn’t it surprising? However, Instagram has now become a crucial marketing tool for almost 5 million businesses around the world!
As a result, the best method to manage any account is to post frequently. “Consistency is the key,” as you may have heard before. However, maintaining consistency on Instagram can be difficult at times. So, this is where this article comes in handy! We’ll show you how to effortlessly schedule your Instagram post in this article, and it’ll be posted automatically without any bother or human labour. So, if you’re a busy bee but want to maintain perfect consistency on your account so that you don’t disappoint your followers, simply follow the procedures outlined below.
How To schedule An Instagram Post (For A Business Account):
Step 1: Create a business profile for your account:
Aside from immediate publishing, Instagram company profiles have access to a number of handy additional capabilities. Instagram analytics, for example, will show you when your followers are online, as well as their location, age, and gender. These characteristics will assist you in better targeting your target audience while promoting your products. You also get a contact button in your profile, making it simple for your customers to contact you.
Also Read:How To Hide Whatsapp Status From Specific Contacts
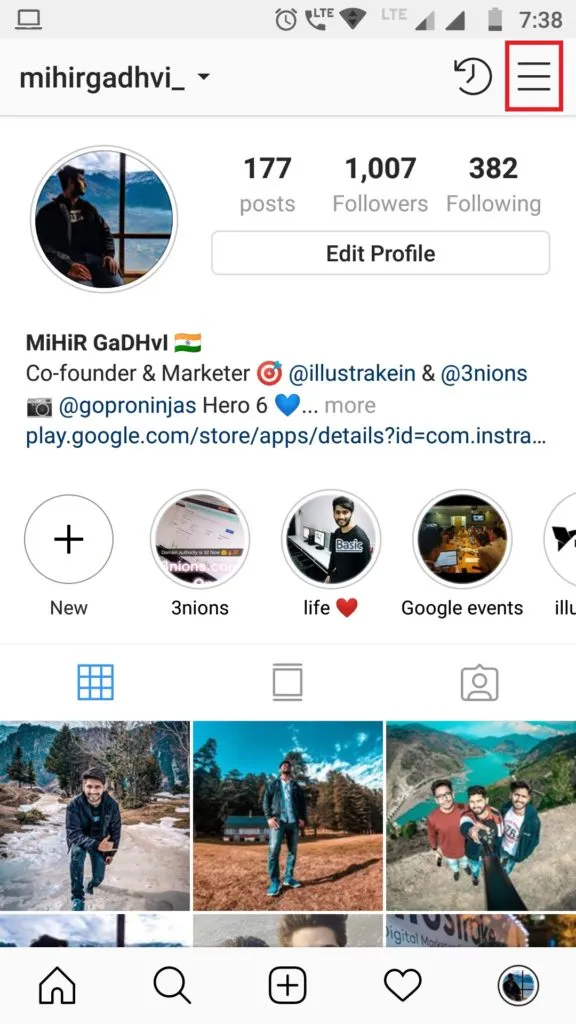
- Tap on the three horizontal lines in the right-hand corner of your Instagram profile.
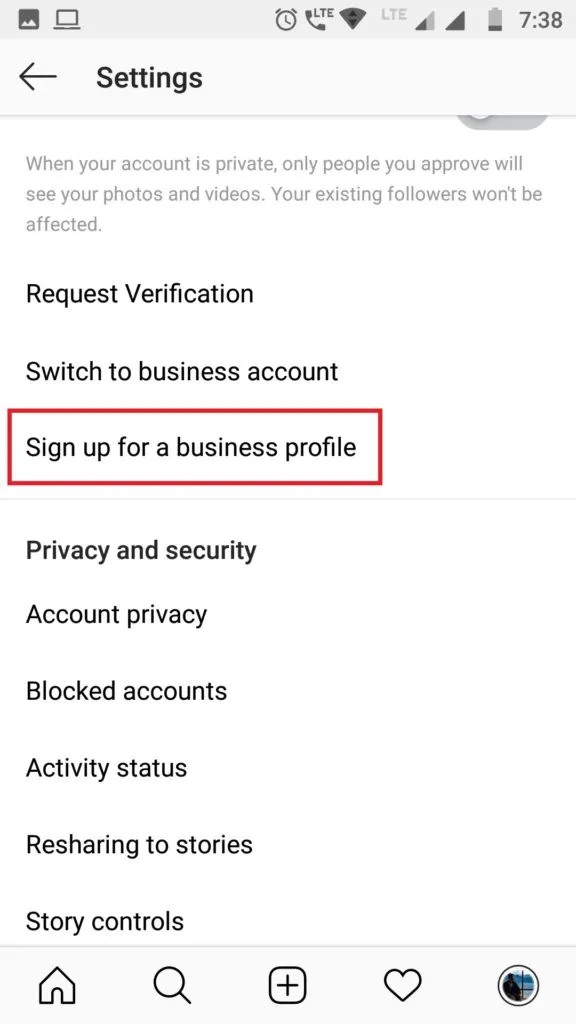
- Now go to “Settings” and select the “Switch to Business Account” option.
- After that, Instagram will ask you to link to a Facebook business page ( you need to have admin access to the Facebook page or you can create one new).
- Choose a category for your business after you’ve chosen a page so that people know what it’s about.
- Fill in your contact information (email address, phone number, and address). At least one of these must be completed.
- After that, tap done! Your Instagram account has now been transformed into a commercial profile.
Make sure your Instagram account is set to public in order for this process to work.
Step 2: Integrate your Instagram account with Hootsuite:
From the Google Play Store, download and open the Hootsuite app.
- Create an account or log in using your Facebook, Google, or email address.
- After that, pick “Add Social Network” from the profile icon.
- Then, from the upper right corner, hit the “+” sign.
- Then, from a list of social media options, select “Connect to Instagram.”
- After that, log in using your credentials.
That’s all, your Instagram account has now been integrated to Hootsuite.
Step 3: When you’re ready, schedule your post:
- After you’ve linked your Instagram account to the Hootsuite app, go to the main menu and select “Streams.”
- After that, you’ll have two choices: My Posts and Scheduled Posts. From the bottom right corner, tap “Scheduled Posts” and then click the create symbol. (In “My posts,” you’ll see your added account’s Instagram postings.)
- Select your account now, and then write the caption, add a location, and then add the image or video as you normally would.
- When you tap “Next,” you’ll be given three options: Send Now, Auto-Schedule, and Custom Schedule. To schedule your posts, select “Auto schedule” or “Custom schedule” from the drop-down menu.
- When you tap on Custom schedule, you’ll see a calendar where you can specify the date and a clock where you can set the time. If you choose Auto schedule, however, the application will schedule it for you at the optimum date and time based on your profile engagement.
You can still update or delete your scheduled posts by tapping “View in Publisher” and then selecting the appropriate choices at the bottom of your screen.
Note: If you’re publishing a photo or video album, you’ll still need to finish the procedure manually when the time comes.
That’s it; using the instructions above, you can quickly schedule your Instagram posts for a specific date and time. So, no more waiting for the proper moment to arrive while lingering over your phone! You can now customise your own timing and choose what works best for you. If you’re unsure, don’t worry; the application will choose the best time for you.
So, if you found this post useful, please share it with your friends on social media. Also, please share your thoughts in the comment section below.