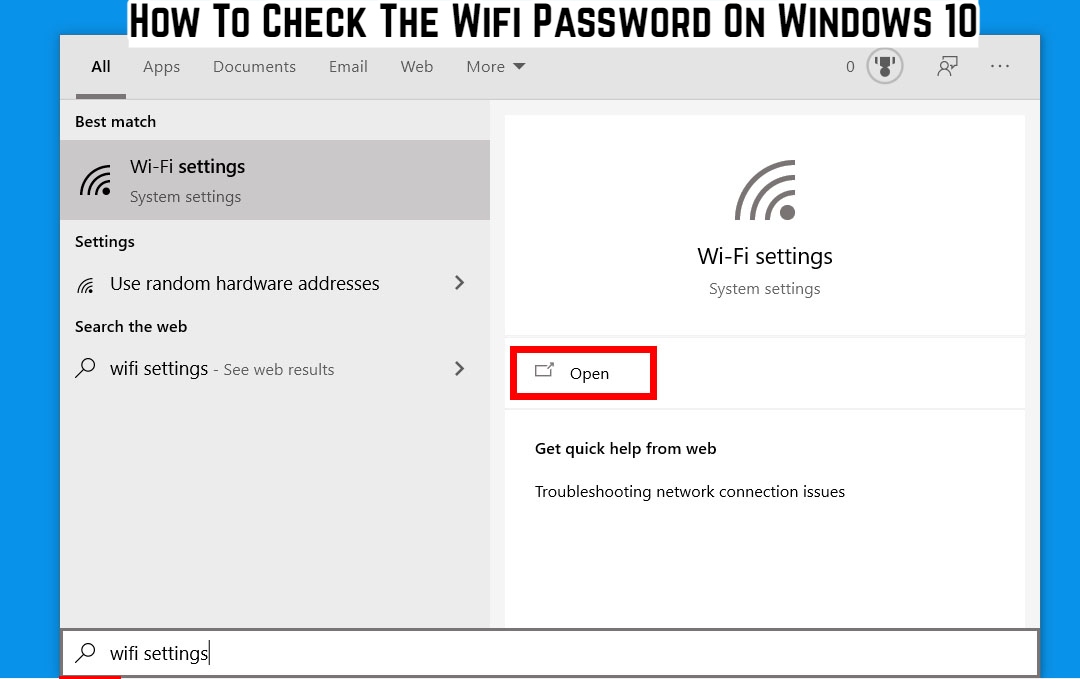
How To Check The Wifi Password On Windows 10 Wi-Fi connections have become quite common over the years, owing to the ever-growing amount of content on the internet and a growing number of people with whom to communicate on a daily basis. Are you guilty of going to a completely unfamiliar location and asking for the Wi-Fi password? We’re all guilty of it. What happens if you forget your own Wi-Fi password? This tutorial will show you how to check the Wi-Fi password on a Windows 10 PC. Keep in mind, however. So jump right in!
How to Check Your WiFi Password in Windows 10
Method 1: Configuration
If you want to see the password of the network to which you are currently connected. Use this method.
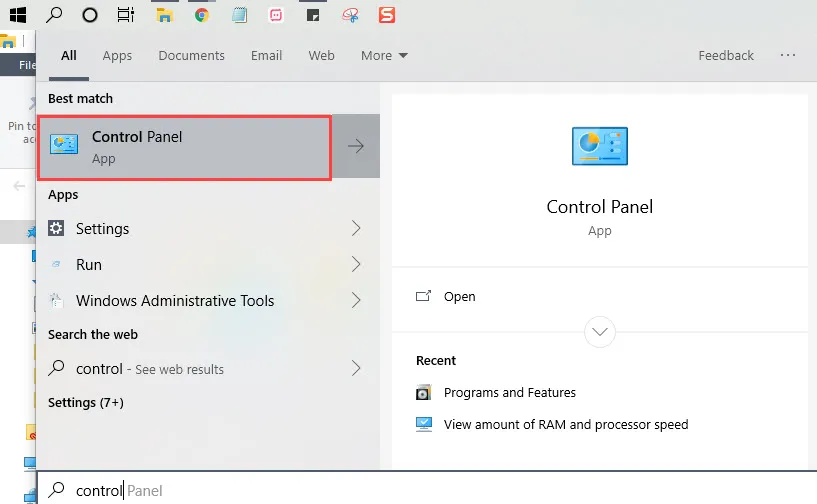
Search for the Control Panel by pressing the Start button. On the first search result, press Enter.
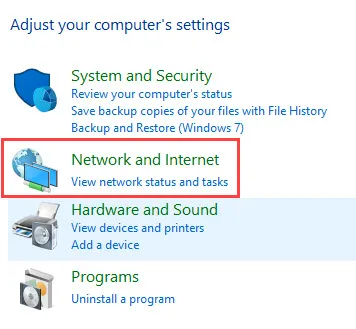
Select Network and Internet from the Control Panel app. It serves as the hub for all network connections that your PC has ever encountered.
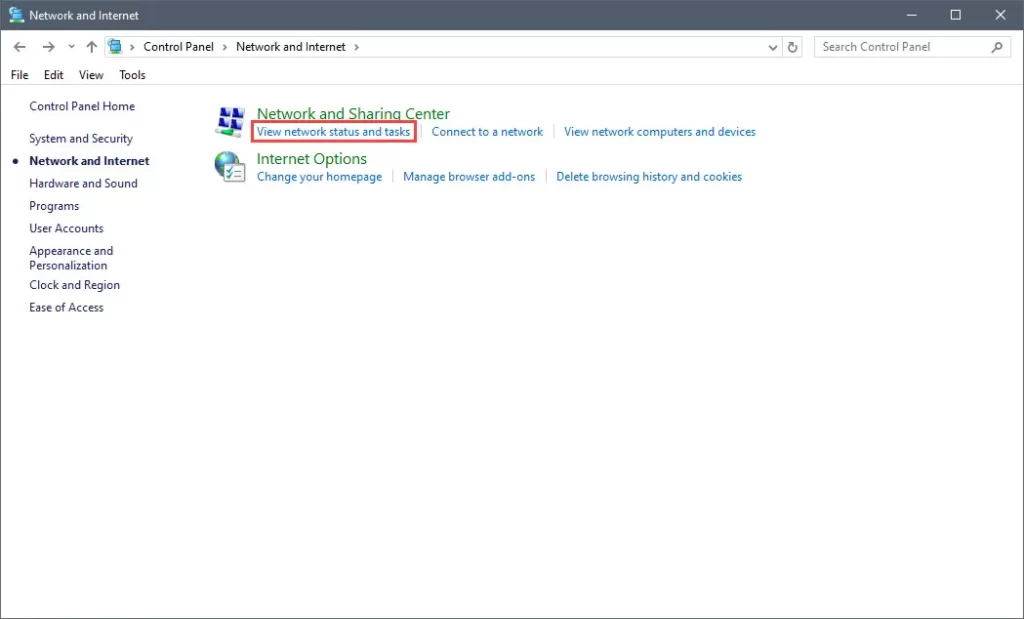
A new window will be launched. Select Under Network and Sharing Center, you can view network status and tasks.
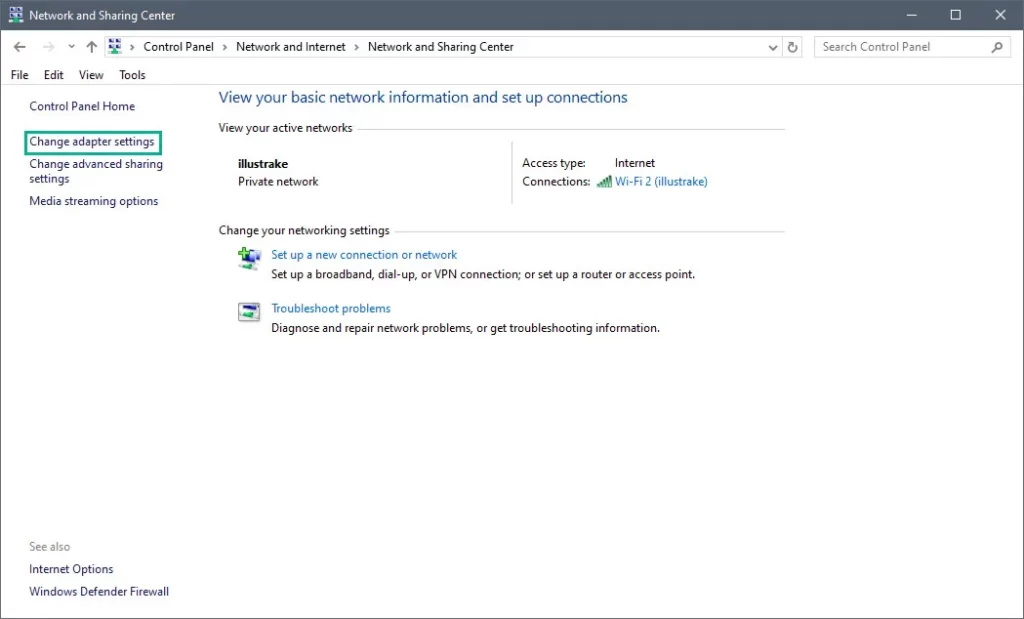
Navigate to Change adapter settings on the left-hand pane once inside the Network and Sharing Center.
The adapter settings will display all of the networks that are connected to your PC. Choose the network whose password you want to learn. Now, in the top right corner, click View status of this connection.
A dialogue box will appear in the form of a pop-up. This setting option will display all of the options related to your Wi-Fi connection, such as the IP address and speed. Select Wireless Properties from the drop-down menu next to Details. This will tell you what type of security your network has, the encryption type, and the Network security key, which is the password you’re looking for in layman’s terms. For security reasons, the password will be hidden. So simply click on Show characters and you’ll have your Wi-Fi password.

If you’re trying to figure out the password of a network that’s out of range, use this method.
Open the Start menu and look for Command Prompt. Run as administrator by right-clicking on Command Prompt.

After you’ve opened the Administrator: Command Prompt, type netsh wlan show profile. This command will display a list of all Wi-Fi.

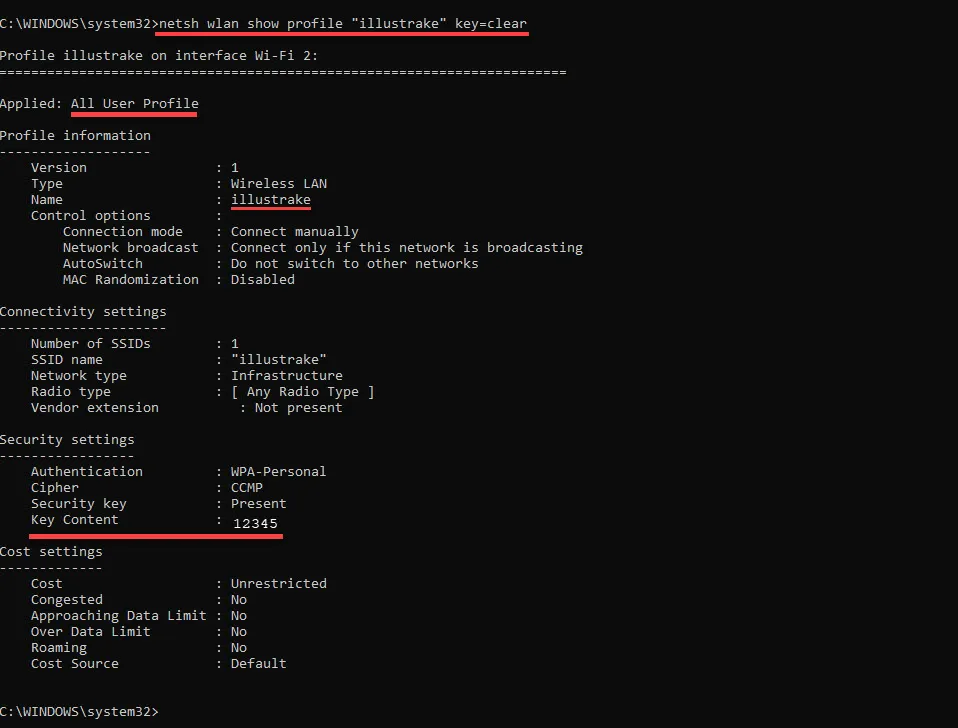
To view the password for any of the listed networks, type netsh wlan show profile “NETWORK NAME” key=clear, which will display the password for that specific Wi-Fi. Make sure to replace NETWORK NAME with the name of a Wi-Fi network from your list. We have entered the name of our Wi-Fi network, “illustrake.”

The password for the network you requested is clearly visible here. It’s right next to the Key content section. This command will not only reveal your network’s password, but it will also provide you with additional information about the connection, such as radio type, authentication, and so on.
These were the two incredibly simple methods for obtaining your Wi-Fi password. Remember, this isn’t a tutorial on “how to hack a Wi-Fi password.” This article will only show you how to check the Wi-Fi password for the networks to which you were (or are still). Connected on your Windows 10 PC.

