How To Unlock Bootloader Of Any Android Device. Unlocking the bootloader is an important aspect of the Android modification process. But how do you go about doing it?
If you’ve heard the term “Android modding,” especially as an inexperienced starter, you’re probably thinking about custom ROMs, rooting, recovery, and other scary-sounding notions. While some of it may be difficult to understand at first, none of it is possible without first unlocking your bootloader.
Unlocking your bootloader allows you to do everything from minor modifications to installing a custom ROM on your phone. However, for newcomers, the concept can be intimidating. We’ll go through how to safely unlock the bootloader on your Android phone, as well as why you’d want to do so.
Table of Contents
What Is A Bootloader And Why Should I Unlock It?

While your phone is fully started up, your phone’s operating system is in charge. However, a smartphone does not immediately resume operation after being turned off. Instead, a little application called the bootloader manages the booting process.
The bootloader is responsible for confirming the integrity of your operating system and initiating the boot process so that you may access and utilise your phone’s operating system.
So, what’s the point of unlocking the bootloader?
A locked bootloader checks to verify if the firmware it’s supposed to load, which is the manufacturer’s firmware, is about to be loaded.
The phone will refuse to boot if the digital signature does not match what the bootloader expects—the manufacturer’s digital signature. A phone with a closed bootloader will similarly refuse to install or sideload anything that hasn’t been signed by the manufacturer.
It just stops worrying about that signature once the bootloader is unlocked. During boot, you can get a big, large warning that your phone’s bootloader is unlocked and it “can’t be trusted” because of this. The bootloader is no longer looking for the manufacturer’s signature as a result of this.
It will not try to block you from installing anything you want, and it will not prevent your phone from starting regardless of what you have loaded.
Third-party software, like as modifications, root solutions, and custom ROMs like LineageOS, can be installed on your phone when this check is removed. You’re effectively allowing anyone to install whatever they want.
This is also one of the reasons why some people advise against it. You risk harming your phone or giving malicious malware the freedom to do whatever it wants if you don’t know what you’re doing.
Unlocking Your Bootloader

Before we get into this section, we should point out that the method we’re about to discuss, which is usually called the “standard,” won’t work for some phone brands. Xiaomi devices, for example, use a unique unlocking tool to unlock their phones.
Also Read:How To Generate QR Code On Android
Other devices don’t have a bootloader that can be unlocked.
We’ll do our best to give a broad walkthrough here, and this lesson will cover the “conventional” technique, but the process varies considerably based on the device and an OEM’s own regulations on bootloader unlocking.
If you want to be absolutely certain, visit the XDA forums to see if your exact device has its own subforum with detailed instructions.
Which Phones Can Have Their Bootloaders Unlocked?
As a general rule, Google Pixel phones, as well as OnePlus phones and Samsung Exynos-powered devices, are totally unlockable. Motorola phones are usually unlocked with a key. Nokia, Oppo, and Huawei phones, on the other hand, are generally not bootloader-unlockable.
It all depends on the brand of your phone and, in some situations, whether you bought it from a carrier or not.
For this, you’ll need a PC with ADB and Fastboot installed. If you don’t already have ADB and Fastboot installed on your computer, you may do so with Nexus Tools, which works on Windows, Linux, and macOS.
With some OEMs, like as Motorola, you’ll additionally need an unlock code. In most circumstances, these are simple to obtain, so don’t be concerned.
Warning!
Before we begin, a word of caution. Your phone will be wiped throughout this procedure. Bootloader unlocking also causes a factory reset as a security measure. As a result, make sure you back up your phone before we enter.
With everything out of the way, let’s get to the steps themselves.
Step 1: Enable USB Debugging And OEM Unlock

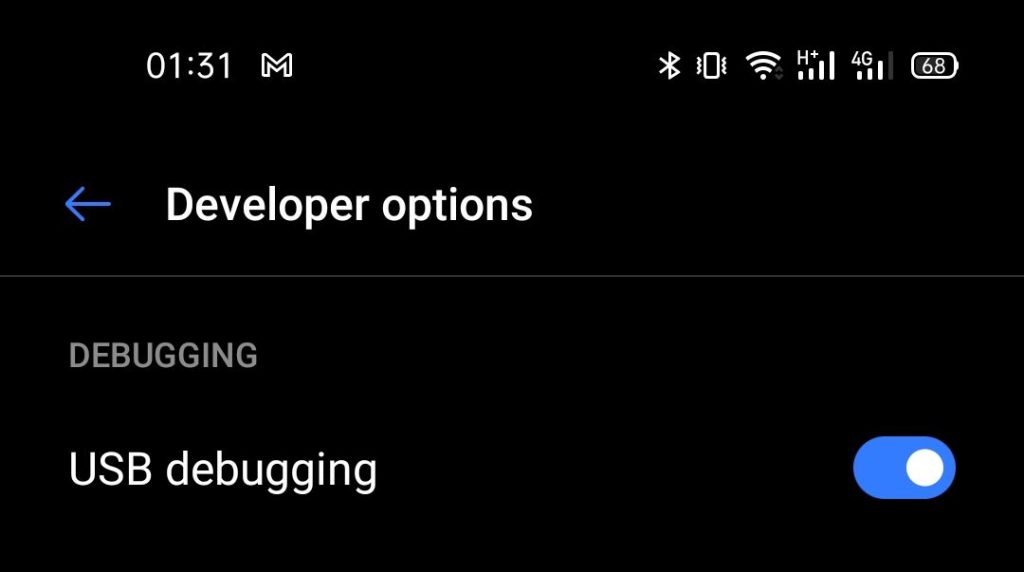
To begin, go to the Settings menu on your phone. Developer options will need to be enabled. It’s usually as simple as going to About phone and touching seven times on the Build number item. If you have a password/pattern, you’ll be required to enter it, and then Developer options will appear in your Settings app.
We want to enable two things here. The first is USB debugging, which we’ll need to enable in order to use ADB/Fastboot on our phone in the first place. The second option is to unlock the OEM, which will allow the bootloader to be unlocked. Before going, make sure those two are turned on.
2nd Step: Obtaining An Unlock Key (For Some Phones)

As previously stated, certain phones will allow you to unlock the bootloader without a key, while others may require one. If you do, the procedure may alter slightly, and you should consult the manufacturer’s website for further information. To unlock your Motorola phone, which is the example we’re using, go to this support website.
The process on Motorola phones is collecting a string in Fastboot with the command fastboot oem get unlock data and giving that string to Motorola, who will then provide you with an unlock code to use to unlock your phone.
If you’re not sure how to get into Fastboot, connect your phone to your computer, open a terminal (you did enable USB debugging, right?) and type adb reboot bootloader.
Step 3: It’s Time To Unlock

It’s finally time to start the bootloader unlocking procedure. Step 2 is optional if you’re using a Pixel or OnePlus phone. Make sure you have the unlock key for your Motorola phone or any other phone that requires one. The code is 20 characters long.
Reboot into fastboot using the command adb reboot bootloader. Then, unlock your bootloader using the command fastboot flashing unlock. On some older Android phones, the command might instead be fastboot oem unlock.
If you’re using a Motorola phone, the command instead will also be fastboot oem unlock followed by the unlock key you were provided with. The command will look something like fastboot oem unlock XXXXXXXXXXXXXXXXXXXX.
Depending on your phone, it may ask you if you want to proceed once you run the command. To affirm yes or no, use the volume buttons.
Congratulations once you’ve completed everything. You’ve successfully unlocked the bootloader.
So, what’s next?
The phone has now been unlocked. You may now root your device, install custom ROMs, and do whatever you want with it. Be aware that some apps, notably financial apps, may not operate now that your phone is unlocked or may break if you proceed.
Take use of your unlocked phone! Also, be cautious of the software you install.


