Life Is Strange Photo Locations In Episode 2.In Life is Strange Episode 2: Out of Time, there 11 Trophies/Achievements associated with locating all of the optional picture chances.
Life is Strange may a story-driven game with decision-making as the core gameplay mechanic, but there are still lots of hidden collectibles to found. These optional photo possibilities can found throughout each episode, with some requiring Max to make specific decisions or the opportunity to capture the shot would lost.
In Life is Strange, Episode 2: Out of Time, there are ten Photo collectibles to find. If some missed, don’t panic; any episode can replayed in “Collectible Mode” from the main menu to look for the missing photo chances without affecting prior player selections. Each photo will unlock a Trophy/Achievement, and once all ten have discovered, the “Lab Master” Trophy/Achievement will unlocked as well.
Table of Contents
All Photo Collectible Locations In Life Is Strange Episode 2
Optional Photo Opportunity 1 – Rabbit (Kate’s Dorm Room)
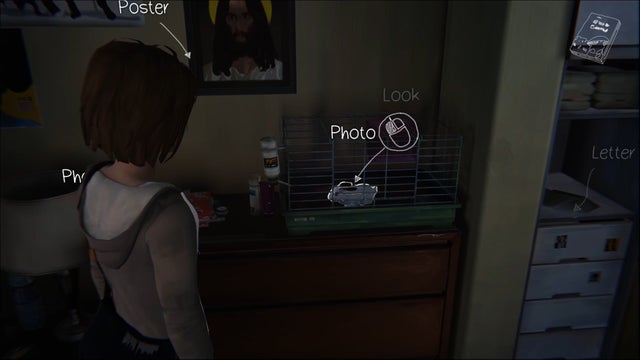
After Max takes a shower and visits Kate’s room to return a book, the first optional photo opportunity in Life is Strange, Episode 2 can acquired. Take a picture of the rabbit in a cage before speaking with Kate. The “Field of View” Trophy/Achievement unlocked as a result of this.
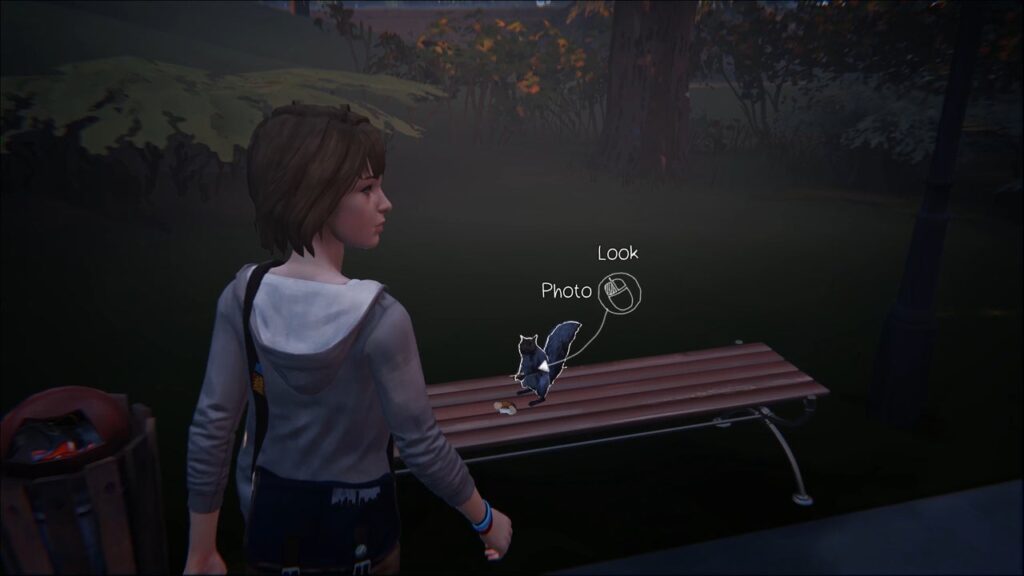
Optional Photo Opportunity 2 – Squirrel (Outside Girls’ Dormitory)

After conversing with Kate and exiting the dorm, turn right and walk past the steps where Max debated whether to mock Victoria or comfort her. In the distance, there is a trash can beside a bench. To attract the squirrel, have Max look at the garbage can first and then grab a bit of food from it.
Return once the squirrel has hopped onto the bench and capture the second optional photo. The trophy/achievement “Full Exposure” will appear. In Episode 1 of Life is Strange, Max takes a similar photo of a squirrel while seeking for collectible photo possibilities.
Optional Photo Opportunity 3 – Diner Sign (Outside Two Whales Diner)
Go to the Two Whales Diner entrance after Max gets off the bus and gaze up. Max can take the third optional photo opportunity in Episode 2 of Life is Strange if he positioned to the left. The “Processor” Trophy/Achievement unlocked as a result of this.
Optional Photo Opportunity 4 – Frank’s Dog (Outside Two Whales Diner)

Continue around the right side of the diner, past the homeless woman. Max may photograph Frank’s dog from this vantage point. When approaching from the left side of the diner, the dog instead barks at Max. The “Image Stabilizer” Trophy/Achievement will appear once you’ve taken a photo.
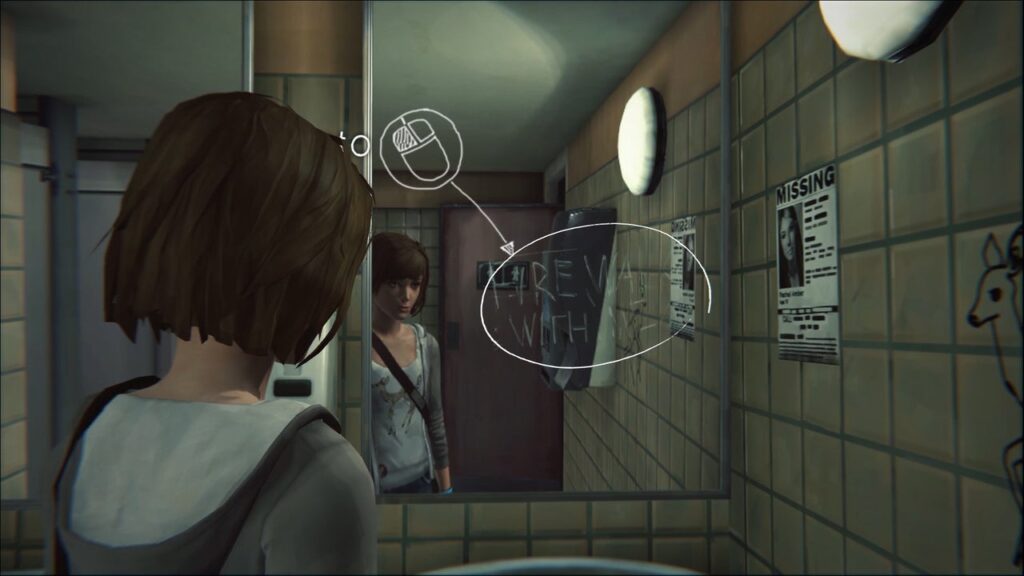
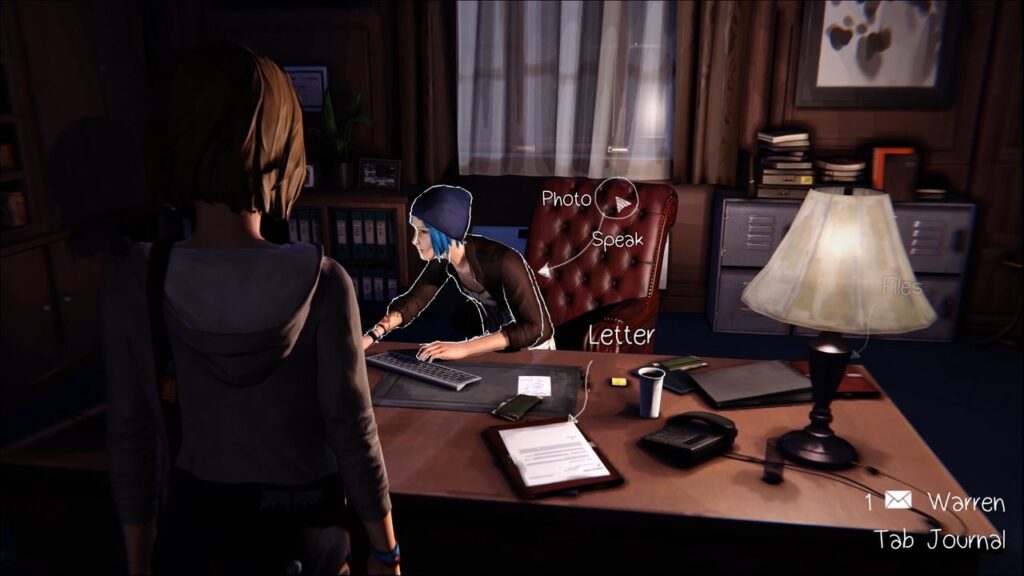
Optional Photo Opportunity 5 – Mirror Graffiti (Inside Two Whales Diner)
Enter the diner after photographing the dog. Take a picture of the mirror covered in the “Fire walk with me” graffiti before having a seat in the bathroom on the left. The “Compressed” Trophy/Achievement will awarded to players. Max will have to make a crucial decision before leaving the diner, one that could affect the outcome of Life is Strange.
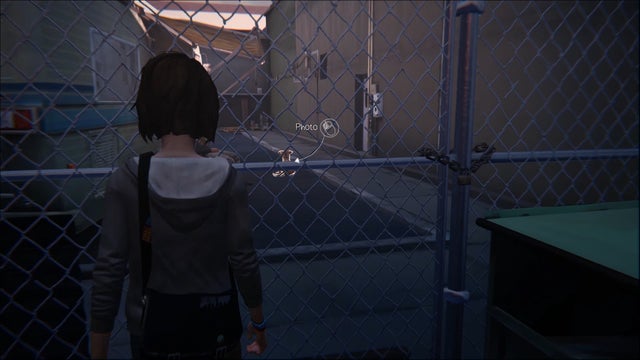
Optional Photo Opportunity 6 – Yellow Bus (Junkyard)
Turn around and stroll all the way to the yellow bus once players get control of Max at the junkyard. To acquire the prompt for the sixth optional photo opportunity, hug the boundary and walk slightly left. The “Pixelated” Trophy/Achievement unlocked as a result of this.
Optional Photo Opportunity 7 – Deer (Junkyard)

After photographing the bus, proceed to its right and inside the small opening in the rubbish. Max will see a deer and can photograph it by following it up and to the right. The “Dynamic Range” Trophy/Achievement appears after photographing the deer.
Also Read:How to Catch Thundurus Location In Pokemon Legends: Arceus
Optional Photo Opportunity 8 – Chloe (Junkyard)
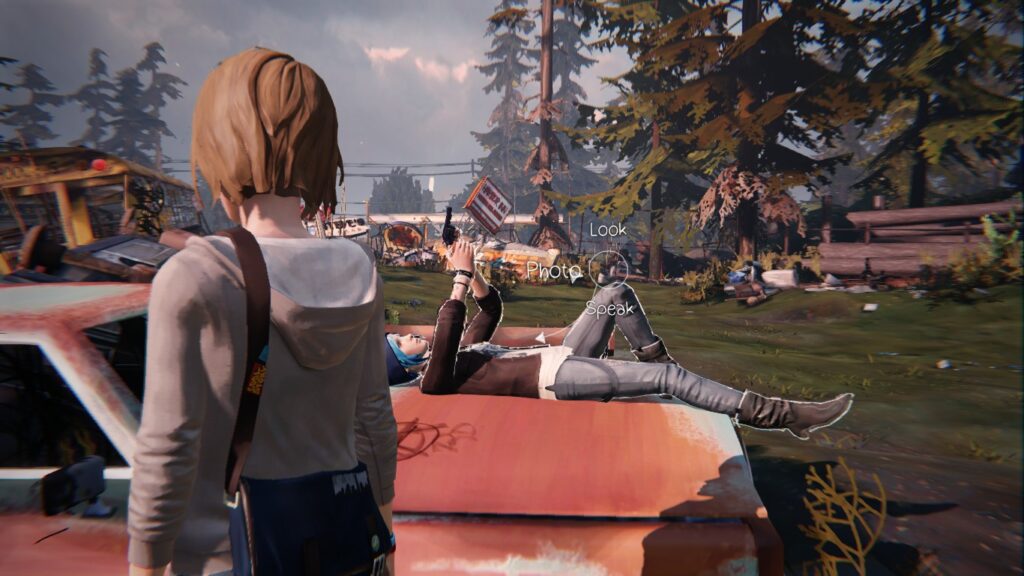
Max will pass out and find himself on top of a car with Chloe. When players gain control of Max after the cutscene, head to Chloe’s left side to receive the prompt to take the ninth optional photo opportunity. The “Colorized” Trophy/Achievement unlocked as a result of this. Max’s storey in Life is Strange can changed based on what players do in the next choice.
Optional Photo Opportunity 9 – Warren (Science Classroom)
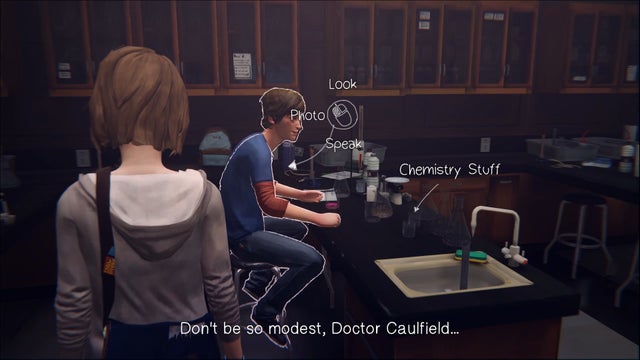
Max will receive a text from Warren at Blackwell Academy, inviting her to meet him in his science classroom. Max going to speak with David first (and get a different set of dialogue options depending on whether she blamed Chloe or took the blame for her weed in Episode 1 of Life Strange).
Pick any response from Warren when you speak with him. Rewind time and go talk to the teacher at her desk, because his experiment will fail. Inquire about the correct element, then return to Warren and tell him the correct answer this time. To unlock the “Meter Made” Trophy/Achievement, Max can now take a photo of himself. If players want Max to develop affections for Warren, helping him can be a crucial decision in Life is Strange.
Optional Photo Opportunity 10 – Alyssa (Mr. Jefferson’s Classroom)
After speaking with Mr. Jefferson, go into his classroom for the eleventh and final photo opportunity in Episode 2. Simply walk over to Alyssa beside the window and take a photo of her staring out the window at the rain. As long as all other optional photo chances have found, the “Resolution Revolution” and “Lab Master” Trophies/Achievements will appear. Max will have to go to Alyssa’s desk after snapping her photo. Depending on whether she reported Nathan or spoke the truth in Life is Strange, Episode 1, Nathan will act differently toward her.
Because the 10 photo chances in each episode of Life is Strange are the only optional unlockables in the game, finding them will result in a quick Platinum Trophy or complete Gamerscore.
Life is Strange: Remastered Collection is currently available on PC, PS4, Xbox One, and Google Stadia, with a Nintendo Switch version coming later in 2022.