How To Check Ram On Windows 10 Laptop & Pc. Since their inception, personal computers have gone a long way. Optional combinations are provided by manufacturers so that buyers can get the most out of their computers. Every component of a computer is necessary for it to function properly, but keeping track of what is where can be tedious. And while we appreciate your excitement when purchasing a new PC, we all humbly hunt for information on the hardware, which is exactly what this article intends to provide! Continue reading if you don’t know how to check RAM on your Windows 10 computer.
Table of Contents
How To Check RAM On Windows 10
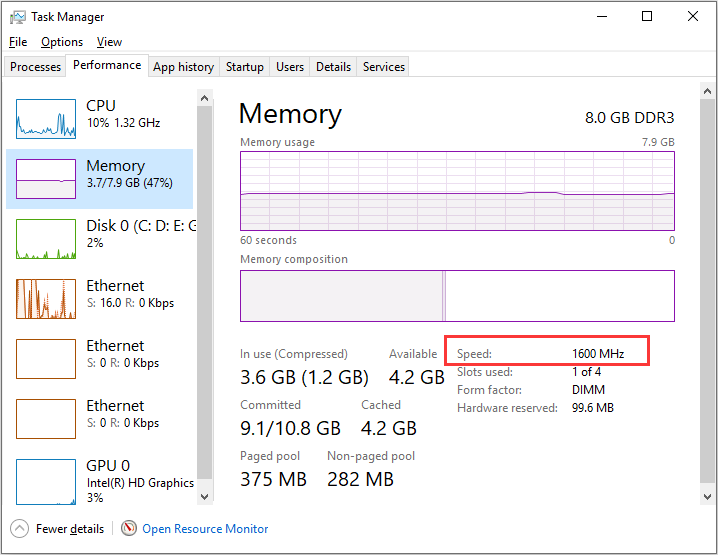
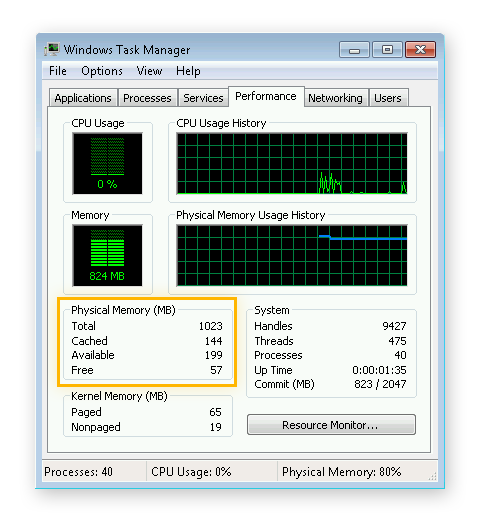
Random Access Memory, or RAM, is a type of computer memory that is accessed at random. RAM is tasked with storing information about the currently operating software. The more RAM you have, the faster your computer will run apps. To check the RAM on your computer, use the methods listed below.
Method 1: Use Task Manager To Check RAM
This is the simplest way to see how much RAM your computer has. You may access the task manager by pressing Control + Shift + Escape or by right-clicking on the taskbar and selecting Task Manager > Performance. Click Open Resource Monitor for a complete report on RAM use.
Method 2: Check RAM via msinfo32.exe
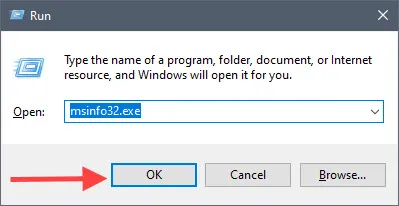
Microsoft System Information, also known as msinfo32.exe in technical terms, is a built-in programme from Microsoft. This allows you to collect information about your computer. To open the Run command, press Windows Logo + R. In the search box, type msinfo32.exe and press OK.
There will be a new window open. Installed Physical Memory may be found under System Summary (RAM). You may also view your PC’s other specifications.
Method 3: Check RAM In Control Panel
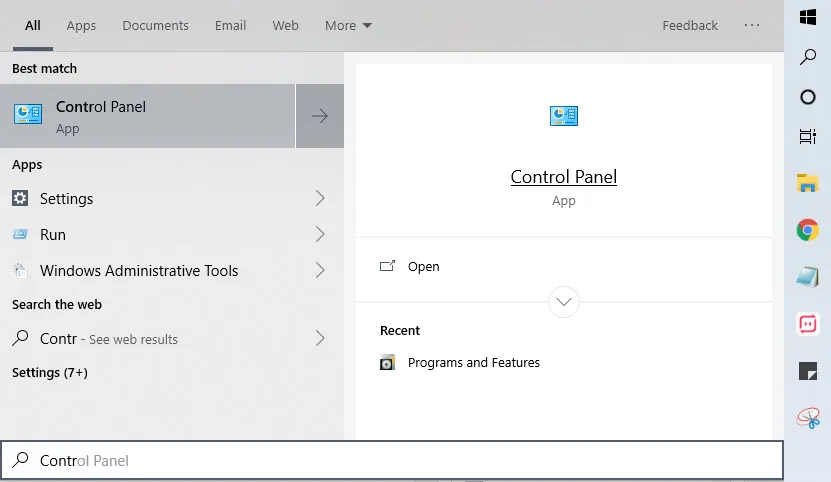
Control Panel is another, albeit lengthy, alternative for checking the amount of RAM in your computer. In the search bar, look for the Control Panel.
Also Read:How To Find the IP Address On Windows 10
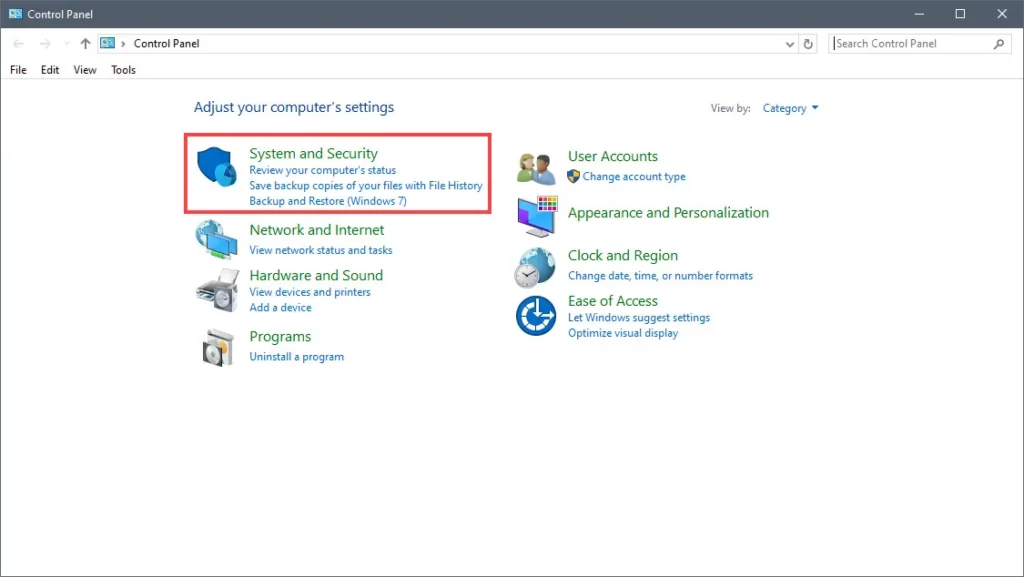
When it’s up and running, go to System and Security. A new menu will appear on the screen.
Select System from the drop-down menu. View the amount of RAM and the speed of the processor.
This window will provide you with the information you require. There’s information about the RAM and processor, as well as the operating system.
Method 4: Driver Easy
Another answer to your main query is Driver Easy. This fantastic tool allows you to quickly examine and update the parameters of your PC.

Select the third option Hardware Info in the Driver Easy programme.
You’ll learn everything there is to know about your computer, including its RAM.
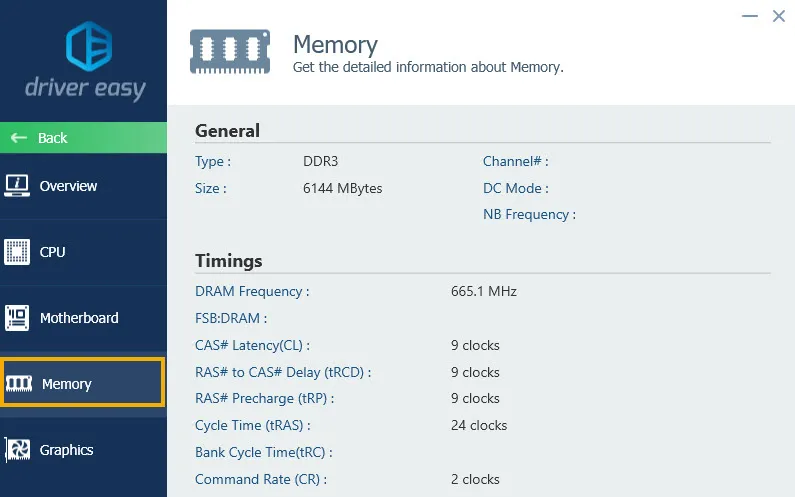
Click Memory to learn more about the RAM. It will provide you with further information.
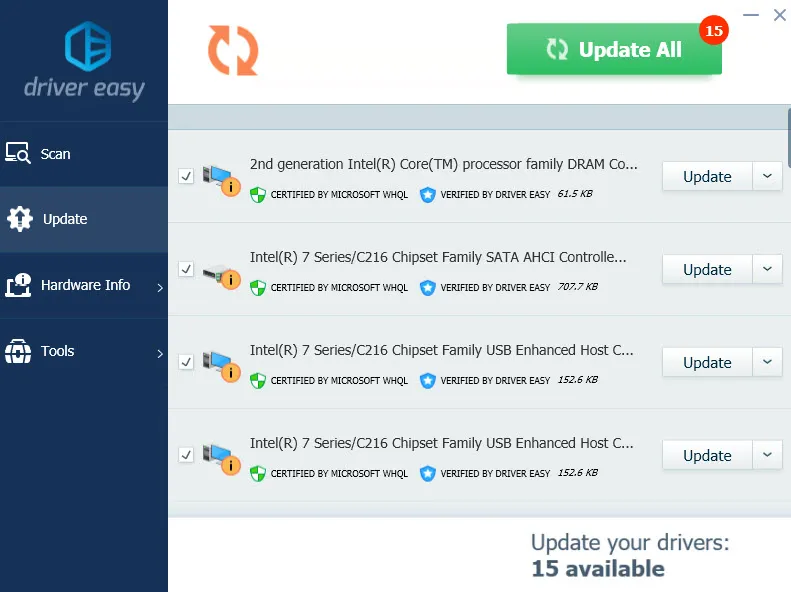
Driver Easy is also recognised for updating your PC’s drivers. So go to the main menu and select Update from the drop-down menu. A list of drivers that need to be updated will appear. A PRO version is also available.
We hope you’ve learned how to check the RAM on your computer by now. These selections will also provide you with a brief description of your PC’s specifications, so make sure you check each one. We’ll continue to provide you with similar tutorials to help you master your PC and Windows 10.

