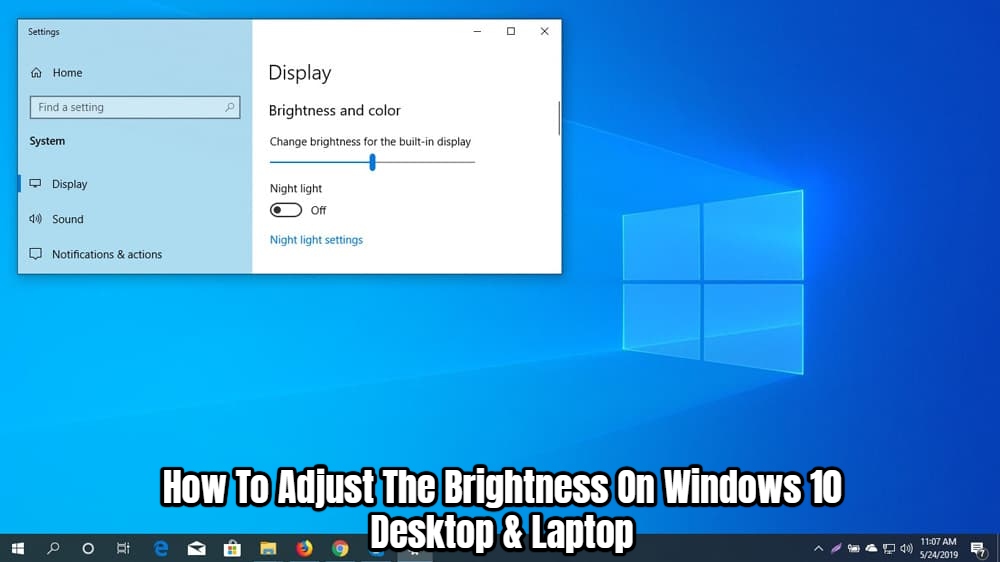
How To Adjust The Brightness On Windows 10 Desktop & Laptop. Windows 10 is updated on a regular basis to fix bugs and add new features for users to enjoy. Those new functions must be investigated, but what about the ones that already exist? Take, for example, brightness. To adapt to the environment, you change the brightness on your computer on a frequent basis. While boosting the brightness in a bright environment may help you view your PC screen better, lowering the brightness in a dark environment will assist reduce eye strain. You can either let the PC decide when to change the brightness or do it yourself. So, let’s have a look at the many options for adjusting the brightness on your Windows 10 computer.
Table of Contents
How To Change Windows 10’s Brightness
Method 1: Keyboard Shortcuts
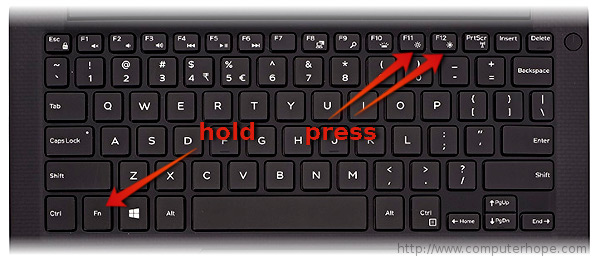
On your laptop’s keyboard, there’s a cute little shortcut that represents a dull sun and a dazzling sun. Directly hit the brightness buttons or utilise a combination of Function + Brightness keys, depending on your preferences. Extra options are frequently found on the F row, so look from F1 to F12. These function keys let you add another functionality to keys, or dual keys in short, and you’ll have to use the combination to access any other key other than the Fn key.
Method 2: Battery Icon
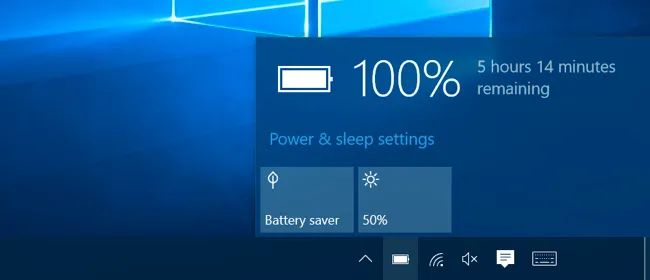
Within the battery icon of your laptop, Windows includes a brightness setting. Simply click the battery icon to reveal a slider with a sun icon. Slide to meet your requirements. However, starting with Windows 10 build 17655, this option is no longer available.
Method 3: Windows Mobility Center
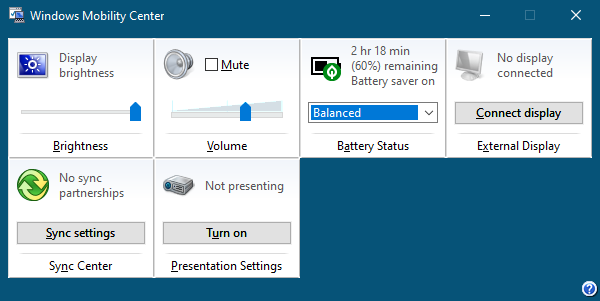
This is a useful application. In your search box, type Windows Mobility Center, or right-click the Start button and select Mobility Center. You can adjust the volume, rotate the screen, and turn on the keyboard backlight, among other things, in addition to the brightness slider. By pressing Alt + Tab, you can keep this application running in the background and summon it up whenever you require these functions.
Method 4: Action Center
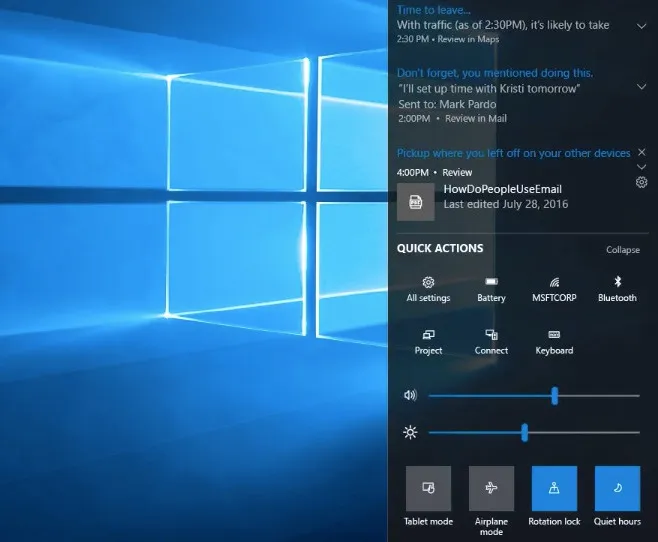
By far the most useful upgrade in any Windows is Action Center. It proudly replaces Charms, the terrible monster. The term comes from the fact that the Action Center has a variety of functions. Windows will add a brightness slider to the Action Center in the 2010 Creators Update, which you can access by pressing Windows Logo + A. Those who haven’t yet received this update should wait and use this approach instead.
Method 5: Settings
All of these options may be found in the Settings menu. From the Start Menu, go to the Settings menu. System and Display should be selected. You’ll notice a brightness slider. To decrease the brightness, drag the slider to the left, and to increase the brightness, drag the slider to the right.
Method 6: Automatical Adjustments
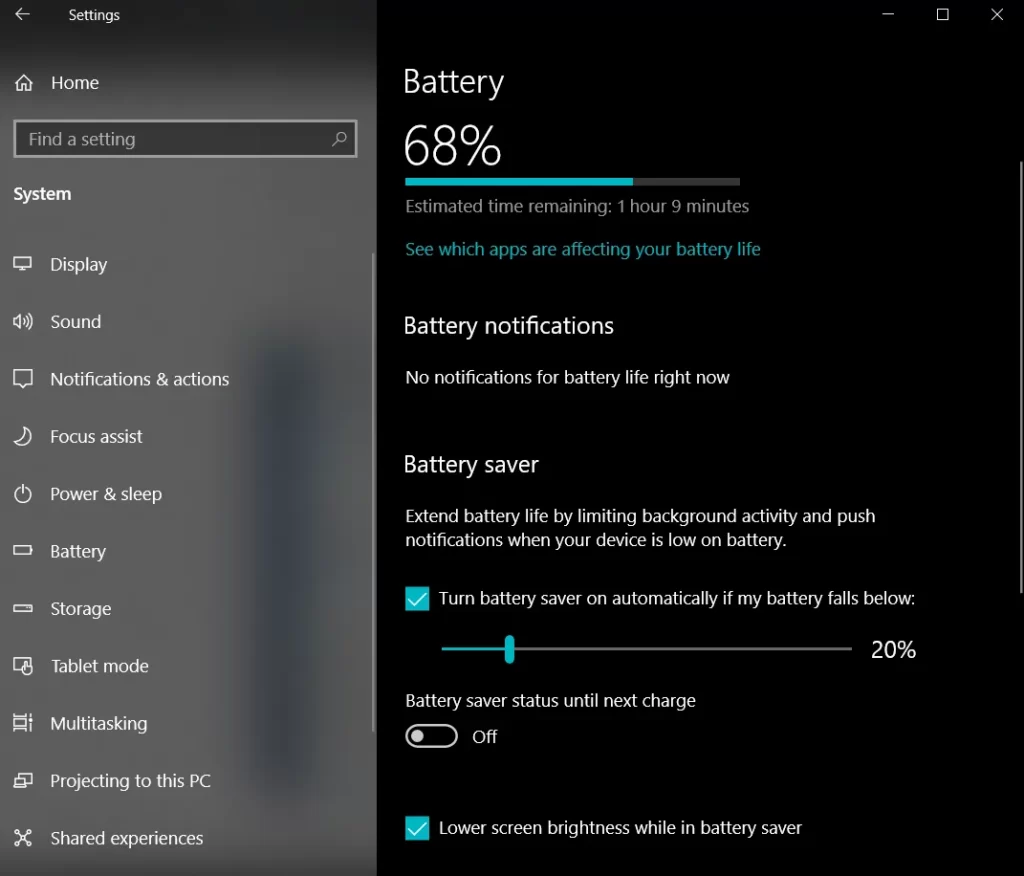
If manually sliding the brightness panel irritates you, you can use this function. Go to Settings > System > Battery > Battery saver > Battery saver settings to accomplish this. Make sure the option to lower screen brightness while on battery saver is enabled. Then decide on what % of the time Battery Saver should be engaged. When your battery hits a certain percentage, the system will reduce your brightness automatically. Your PC’s battery level reaches 20%, the system switches to Battery Saver mode.
When working on that presentation or editing a film in a dimly lit space, these methods will come in helpful to let in more light. Methods 1,2, and 4 will not work if you are using an assembled PC or attaching a separate display.

