How To Take Screenshot On Oculus Quest. On the Oculus Quest 2, there are plenty of fascinating, great-looking apps and games. From the dazzling lights of Beat Saber to the relaxing colouring experiences of Color Space. All of which are ripe for screenshotting and sharing on social media – but how do you do it? On the Oculus Quest 2, there are a few different ways to take screenshots and videos. Including a hidden controller shortcut that disclosed during the setup process.
On your Oculus Quest 2, we’ll show you how to take, review, and share screenshots.
Table of Contents
Take a screenshot on Quest 2 using the Oculus Touch controller
Using the Oculus Touch controllers is the simplest way to capture a screenshot. But how can you do it without a dedicated screenshot button? It turns out that it’s nearly as simple as taking. A screenshot on a smartphone if you know which buttons to tap.
To snap a screenshot with your Oculus Touch controllers. Simply hold the Oculus button on the right controller and push the trigger on either controller.
You should hear the sound of a camera shutter. And receive a notification indicating you’ve captured a screenshot if it’s successful.
Take a screenshot or video using on Quest 2 using on-screen controls
If you can’t capture screenshots with the Oculus Touch controllers for any reason. You can use on-screen controls from within the virtual world to trigger. The feature – but it’s not as quick and easy as some might prefer.
To use the Oculus Quest 2’s on-screen controls to snap a screenshot or record. A video of a virtual game or experience. Press the Oculus button on the right controller to access the Oculus menu.
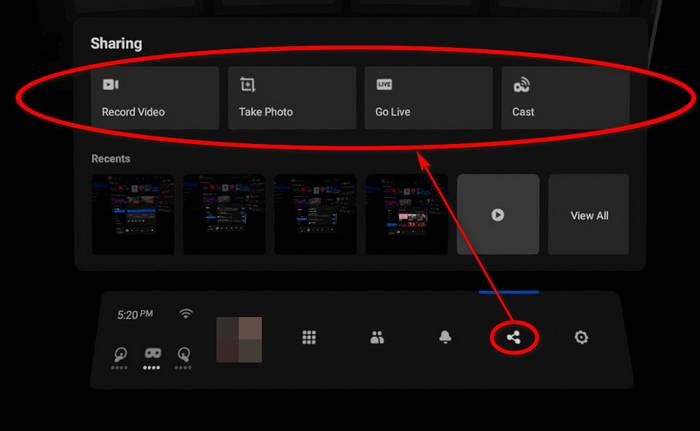
Using the proper buttons, you can return to the app, close the programme. Or take a screenshot, video, or cast your current view to a local Chromecast device. You’ll directed back to your app after selecting either screenshot or video. And it’ll captured in a matter of seconds.
Also Read: Elden ring 2 release date
How to see captured screenshots on Quest 2
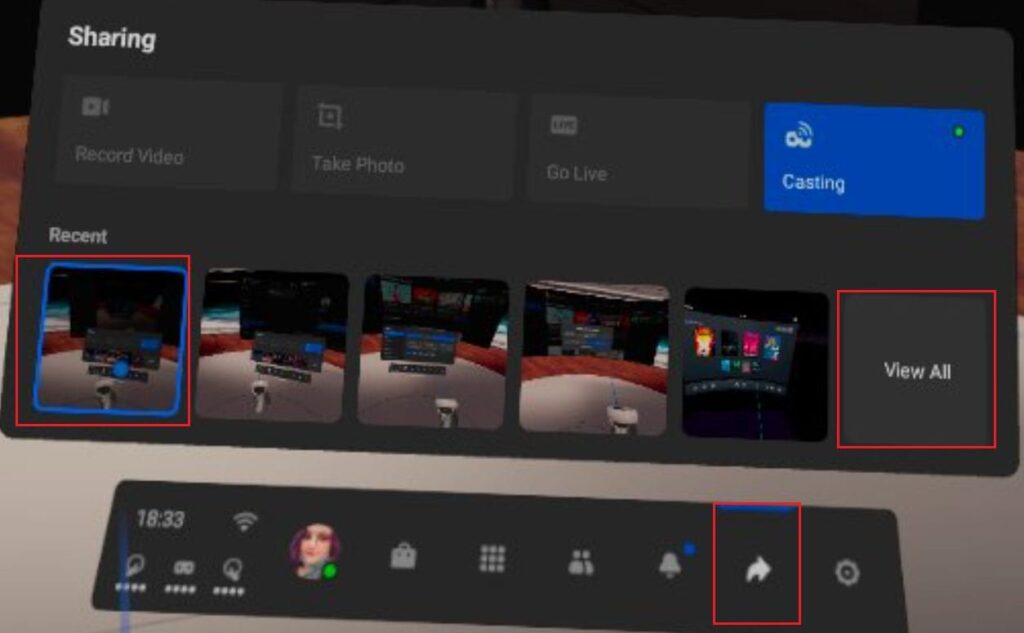
On your Oculus Quest 2, you can view captured content using the Sharing tab or the Files app.
The Sharing option – the symbol with the arrow furthest to the right on the redesigned. Oculus toolbar – is the quickest method to rapidly glance at recently collected content. You can view newly captured content by clicking on the icons from this page.
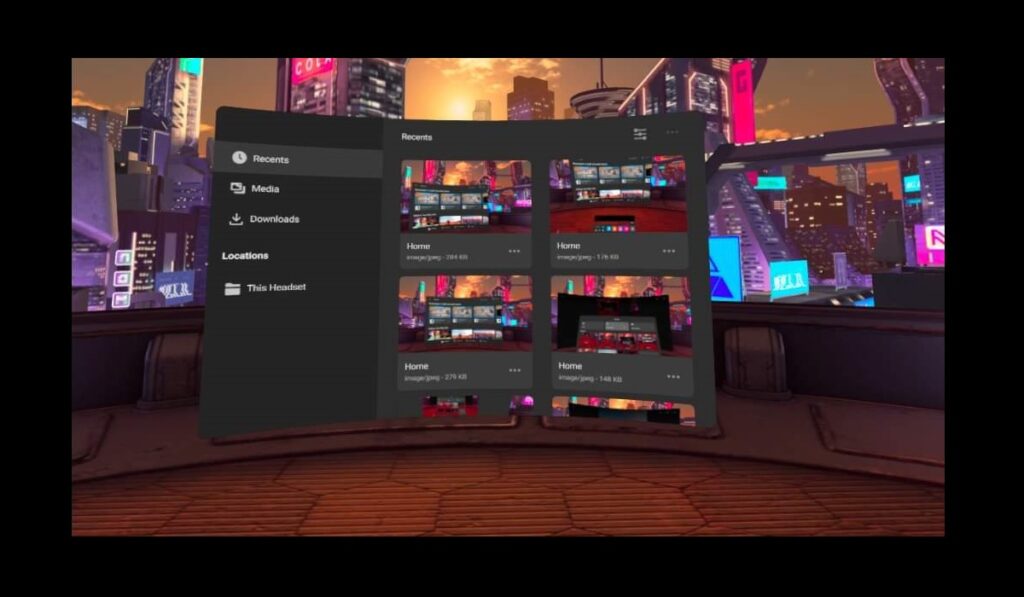
If you’re looking for an older screenshot or video, the Files app is the way to go. The Files programme, which can found in the Apps menu on the Oculus home screen. Allows you to view all of the data on your Quest 2 headset.
Select the media tab on the left-hand menu after opening the Files app. After that, you’ll be able to go through all of the screenshots. And movies currently stored on the headset.
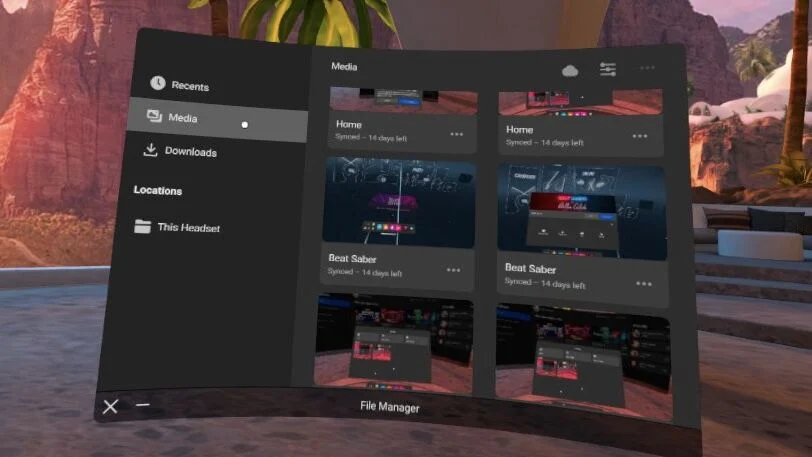
Bonus tip: If you have Oculus software version 32 or later. You can sync your captures with the Oculus app on your smartphone. To use the feature, simply tap the cloud icon in the top-right corner. Then open the Oculus software on your smartphone to begin the sync process. Sharing screenshots from Quest 2 has never been easier!
