How To Install Windows 11 From A USB Drive. Microsoft has made the official ISO files for Windows 11 available, allowing users to install it from a USB or other flash device. Here’s how it works:
Although Windows 11 was first announced in June, it is now available for download. There currently a few new devices with the OS pre-installed, and there will lots more soon.
You can install Windows 11 right now if you have a suitable Windows 10 device. The Windows 11 download page now available, and the Installation Assistant makes getting started a breeze.
You’ll also find the official ISO file there. It’s the quickest and most convenient way to copy it to a USB stick or other flash drive and install it on as many compatible devices as you want.
Despite Microsoft’s official backing, the procedure is still fairly difficult. Here’s everything you need to know about it.
Table of Contents
Check You Have Enough Space
Before you start, double-check that you won’t run out of room at any point. Because the Windows 11 ISO file 5.1GB in size, you’ll need enough space on the computer where it being downloaded, as well as any flash drives you using and the target devices.
If this is proving difficult, our advice to clearing up space in Windows 10 may be of assistance. It’s worth backing up any files you won’t need right away and then conducting a factory reset. You can then choose what you want when you get back to your PC.
Also Read:How To Turn Off Auto Macro Iphone 13
Get The ISO File Here
Signing into a Microsoft account and registering for the Windows Insider Program were previously required steps in the download procedure. It’s a lot easier now:

- Go to the Windows 11 download page for further information.
- Click ‘Download Now’ under ‘Create Windows 11 installation media.’
- The Media Creation Tool is about to start downloading. Double-click it once it finished to run it.
- To get the ISO file, follow the steps below.
Make sure you choose this option if you need to keep any of your existing files or data. Once installed, Windows 11 will operate as if the device had just unboxed.
However, installing it using a USB drive is a little more difficult.
Copy It To A USB Drive
The first stage is straightforward. Like any other download, the ISO file will appear in File Explorer (or Finder if you’re on a Mac). Simply connect your USB stick or other flash drive to your computer and upload the file as usual — it’s a large file, so this may take a minute or two.

Make sure you eject it before unplugging it once it’s on the USB.
Start Windows 11 From The USB Drive
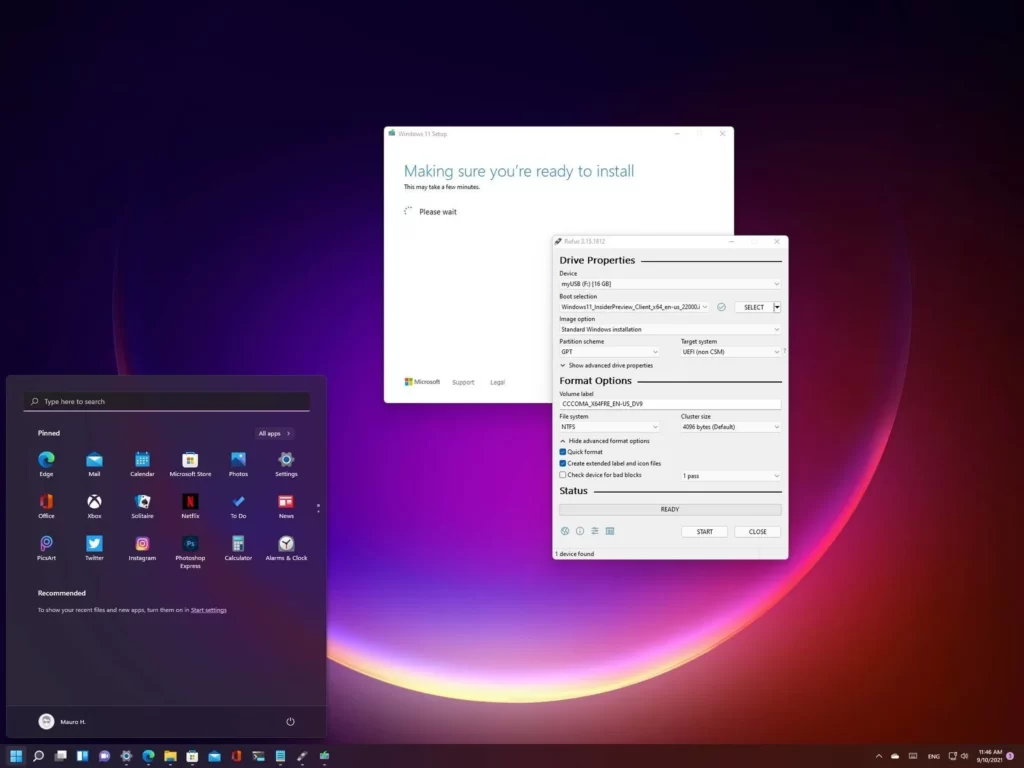
This where things start to get complicated. If you want to utilise that USB stick to run Windows 11 once it’s plugged in, you’ll need to make it bootable. Rufus recommended by Microsoft for this:
- Download and install the most recent version of Rufus (3.15 at the time of writing) on the device that also has Windows 11.
- Place the USB drive on which the ISO file will mounted. Ascertain that it has at least 8GB of free space and that all other files have deleted.
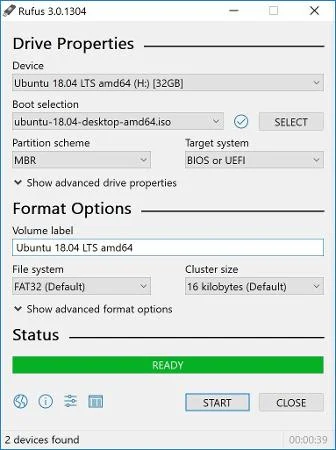
- Select the required USB under ‘Device’ from the main Rufus panel.
- Under ‘File system,’ choose NTFS, and under ‘Partition scheme,’ choose MBR.
- Click ‘SELECT’ to the right of ‘Boot selection’ and select the ISO file.
- To begin the process, click ‘Start’ — The length of time this takes determined by the speed of your USB stick.

After you’ve finished, you’ll have a USB stick that you can use to install Windows 11 on any compatible device.
- Connect the USB stick to the device you want to use.
- Restart the computer.
- Hold the F8 key before the Windows logo appears to start Safe Mode.
- Choose ‘Use a device’ from the drop-down menu and choose the USB stick.
The Windows 11 ISO image you downloaded should now boot up on your computer. If this is not the case, you may need to disable Secure Boot in the BIOS settings.


