How To Defeat The Final Boss In Darkest Dungeon 2 , like its predecessor, is being made available to players as an early access title, which means that developers will be listening to community feedback in order to shape the iconic sequel to the Indie smash hit. This gives players a lot to look forward to in terms of the game’s future, but it is important to note that, in its current state, Darkest Dungeon 2 appears to be “episodic,” with developers looking to add new content in a “acts and chapters” style structure.
Right now, players must sift through the entire first act, which includes multiple characters, a few bosses, a few zones, and a final battle at the top of a massive mountain. But how long does it take for players to reach the summit, and what awaits them once they pass through the veil? Here’s a look at what it takes to get to the edge of the abyss and how to defeat the final boss of Darkest Dungeon’s Act One.
Table of Contents
How to Get to the Peak
Many aspects of Darkest Dungeon 2 are generated at random and procedurally. Because of the plethora of skills, ailments, enemy compositions, and zones, no two journeys are ever the same.
In order to reach the freezing summit, players must first pass through three zones. It doesn’t matter what order players attack these zones in, as long as they make it through three of them. That may appear simple on the surface, but due to Darkest Dungeon 2’s punishing world, it’s all too common for players to find themselves restarting from the beginning, especially in the early hours of their journey.
The Foetor, The Scorch, The Tangle, and The Sluice are all dangerous places, and any given run can be more (or less) punishing depending on which paths players take through each area. Despite developers’ assurances that each run will be successful,
How To Reach The Final Boss Of Act One In Darkest Dungeon 2

Once players have progressed through three zones and are sitting comfortably at the Inn, they will only have access to one path moving forward. The traditional “choose your zone” icon will be replaced by an extra-large icon depicting The Mountain’s shrouded, looming peak. Once gamers have completed all of their tasks and stocked up on as much as they can at the Inn, they can set out for the freezing tundra.
The Mountain is unlike most zones in that it is much shorter and has one extra-long straight path that creeps towards a massive gate-like structure. Despite the fact that it’s a “straight shot” to the boss’ chamber, players will still have to face some enemies before they can enter.
Two Cultist Lairs are scattered along the path, though they differ slightly from the traditional “three battle” structure from previous zones. Instead, players will enter a Lair and face off against a Mini-Boss. Gamers should avoid becoming complacent in these battles, as the Cultists are capable of completely annihilating a team. After defeating both Cultist Mini-Bosses, players can ride the Stagecoach to the final Act One encounter.
How to Defeat Act One’s Brain Boss

ALSO READ:How To Join Outpost Rush In New World
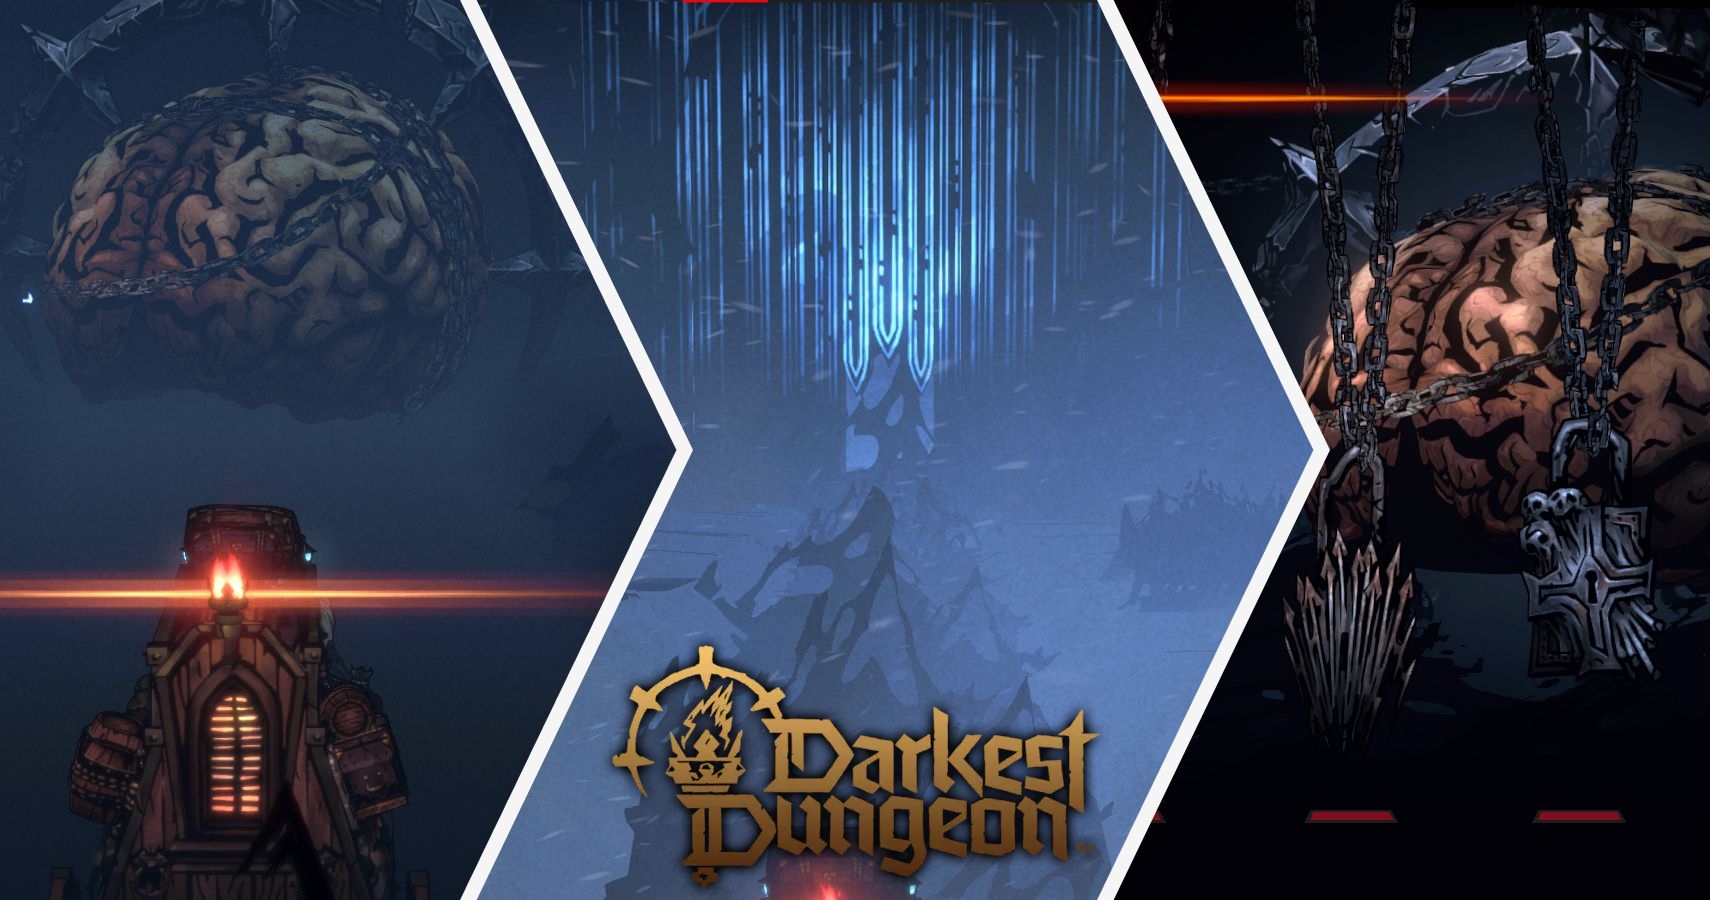
Act One’s final battle pits a slough against a massive brain. Aside from symbolism, this adversary is capable of flipping a player’s traditional tactics by “changing the rules of battle” as it sees fit. The actual battle isn’t against the Brain, but rather against a set of locks that adorn the battleground in front of it.
Each of these locks has the potential to turn the tide of battle by granting a Denial at the start of each turn. The locks can prevent players from reducing stress, healing, using ranged attacks, or even melee attacks.
To make matters worse, the locks themselves come with some fairly powerful attacks that can quickly overwhelm players. They’ll also apply status effects, stack stress pips, and stun characters. Fortunately, the fight appears to get easier as time passes (fewer locks mean less damage or game-changing mechanics), but the early stages of the lengthy battle can be overwhelming for some.
How to Defy the Brain Boss
- At the beginning of each turn, a random lock will use a Denial spell to take away a specific mechanic. Players should focus on removing the lock that is responsible for Stress-Reducing Denial first and then move on to getting rid of the lock that denies Healing.
- Each Lock has its own stats, as well as its own resistances. Players should pay attention to the lowest number listed for a particular lock’s resistances and then use the appropriate status effect to help whittle its health down faster (I.E. burning, bleeding, blight, etc.).
- Paracelsus’ upgraded Ounce of Prevention helps a lot in this fight as it removes stress for the entire party. In addition, Jester can be helpful thanks to their stress-removal song.
- To help things go smoothly, players shouldn’t be afraid to use heals and items early to keep their party as healthy as possible.
- Having a Tank works very well for this fight, especially one with the ability to shield other allies or taunt. Some of the attacks that the locks use will hit multiple players at once.
- This powerful ability is capable of adding 4 stress pips to a single player. For this reason, it’s always important to keep all characters below 5 pips of Stress at all times.
- Some attacks are capable of applying blight onto a character so taking Blight removal and having a character capable of removing the ailment (like Paracelsus) is important.
- Trinkets that help boost attack power can go a long way to helping end the early stages of the fight, making it easier for players to survive and manage stress.


